
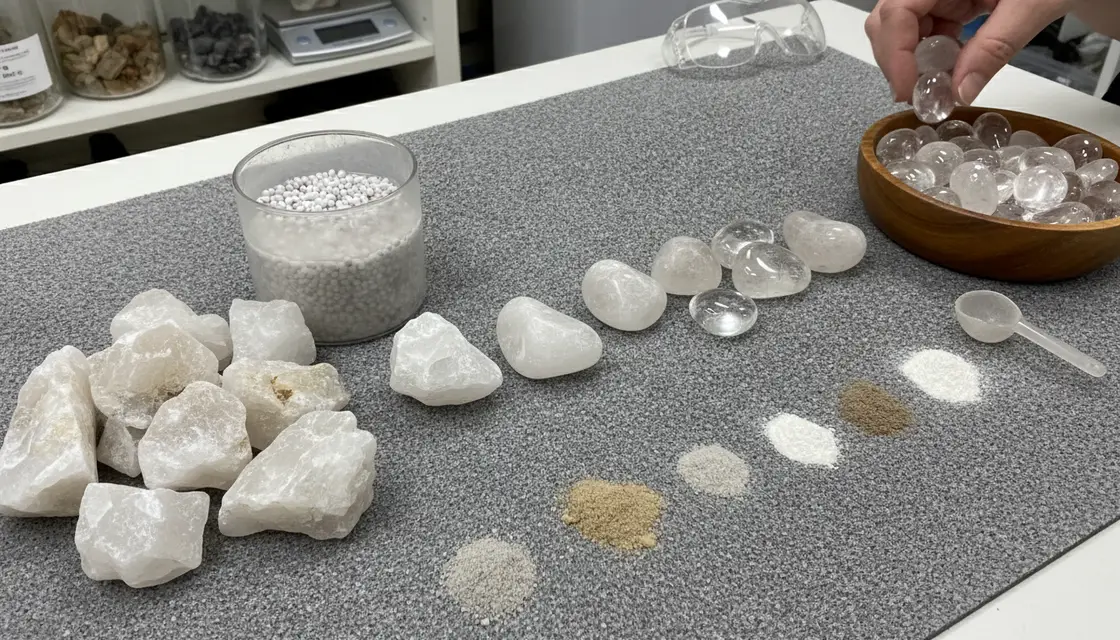
Tumbling Quartz: The Complete Guide to Clear Results
To successfully tumble quartz, you need to account for its hardness (7 on the Mohs scale) and its tendency to chip or "bruise." The process requires four distinct stages of silicon carbide grit followed by a high-grade polish like Cerium Oxide. Because quartz is often translucent, any internal fractures or surface scratches will be visible, making the use of ceramic media essential for cushioning during the later stages.
Generally, a full cycle for quartz takes 4 to 6 weeks in a rotary tumbler. The key to professional results is patience in the first stage to ensure all pits are removed and meticulous cleaning between stages to prevent cross-contamination.
Introduction: Why Quartz is the Perfect Project
Quartz is often the first "real" stone a hobbyist falls in love with. It is abundant, incredibly varied—ranging from clear Rock Crystal to smoky hues and milky whites—and it takes a spectacular shine. However, if you’ve ever pulled a batch of quartz out of the tumbler only to find it looks "frosty" or has tiny white chips on the edges, you know that this common stone requires a bit of specialized care.
This guide is for the hobbyist who wants to move beyond the "shiny pebble" phase and achieve that professional, gem-like clarity. Whether you are fitting this into a busy weekend or using the rhythmic hum of the tumbler as a meditative backdrop to your daily routine, mastering quartz is a rite of passage in the lapidary world.
What You’ll Need
Before you start, ensure you have the right supplies. Quartz is harder than the glass or craft-store stones you might have started with, so your materials need to match its durability.
- Rough Quartz: Look for "Rose Quartz," "Amethyst," or "Clear Quartz" rough.
- A Rotary Tumbler: While vibratory tumblers are faster, a rotary tumbler is better for the initial shaping of rough quartz.
- Grit Kit: High-quality Silicon Carbide (60/90, 220, and 500 or 600 grit).
- Polishing Agent: Cerium Oxide is the "gold standard" for quartz, though high-grade Aluminum Oxide also works well.
- Cushioning Media: Ceramic vs Plastic Media: When to Use Each for Perfect Polished Rocks is a vital choice here—we recommend ceramic cylinders for quartz to provide weight and protection.
Quartz vs. Other Common Materials
Understanding where quartz sits on the hardness scale helps you avoid the mistake of mixing it with softer stones, which would be ground away to nothing.
| Feature | Quartz (Clear, Rose, Amethyst) | Glass / Obsidian | Agate & Jasper |
|---|---|---|---|
| Mohs Hardness | 7 | 5 - 5.5 | 6.5 - 7 |
| Tumble Time | 4-6 Weeks | 2-3 Weeks | 4-8 Weeks |
| Fragility | Moderate (prone to bruising) | High (easy to chip) | Low (very durable) |
| Best Polish | Cerium Oxide | Cerium Oxide | Aluminum Oxide |
Step-by-Step: How to Tumble Quartz
Stage 1: Shaping (Coarse Grit)
Fill your barrel 2/3 to 3/4 full with rough quartz. Add your 60/90 Silicon Carbide grit (usually 1-2 tablespoons per pound of rock). Add water until it just reaches the bottom of the top layer of rocks.
- Duration: 7–10 days.
- Goal: You want the rocks to be smooth with no sharp edges. Because quartz is hard, you may need to repeat this stage multiple times, recharging with fresh grit each week until you are happy with the shape.
Stage 2: Smoothing (Medium Grit)
After a thorough wash, return the stones to the barrel with 220 grit. This stage removes the deep scratches left by the coarse grit.
- Duration: 7 days.
- Pro Tip: This is where you should start adding ceramic media if your rock volume has decreased. The barrel must remain 2/3 to 3/4 full to tumble correctly.
Stage 3: Pre-Polish (Fine Grit)
Now we move to 500 or 600 grit. This stage is crucial for quartz. Since quartz is translucent, the "pre-polish" sets the foundation for clarity. For a deeper look at these steps, check out The 4 Stages of Grit: A Simple Guide to Professional Rock Polishing.
- Duration: 7 days.
- The "Squeak" Test: After washing, a stone from this stage should feel incredibly smooth and might even "squeak" when you rub your thumb across it.
Stage 4: The Final Polish
This is where the magic happens. Use Cerium Oxide or a high-grade Aluminum Oxide polish.
- Duration: 7–10 days.
- Crucial Step: Ensure your ceramic media is also perfectly clean. Even one grain of 60/90 grit from Stage 1 can ruin the entire batch at this point.
Avoiding the "Bruised" Look
The most common frustration with tumbling quartz is "bruising"—the appearance of tiny white lunar-shaped fractures on the edges of the stones. This happens when the rocks bang into each other too hard in the barrel.
How to prevent it:
- Increase Media: Use more ceramic pellets to act as a "buffer" or "pillow" for the stones.
- Check Water Levels: Ensure there is enough water to create a slurry that slows the impact.
- Don't Underfill: A barrel that is only half full allows stones to drop and impact with too much force.
Identifying Your Rocks: Is it Really Quartz?
Before you start, it’s helpful to know exactly what you have. Quartz comes in many forms. If your stone is purple, it's Amethyst; if it's pink, it's Rose Quartz. If it's opaque and has bands of color, you might actually be looking at an Agate. While Agates are also a form of silica, they are often tougher and can handle a more aggressive tumble than clear quartz.
Common Beginner Mistakes
- Impatience in Stage 1: If you move to Stage 2 while there are still deep pits in the quartz, those pits will trap grit and contaminate your later stages.
- Pouring Slurry Down the Drain: Never do this! The rock dust and grit will harden like concrete in your pipes. Always use a bucket and dispose of the waste in the trash or yard.
- Mixing Hardness Levels: Never tumble quartz with softer stones like Calcite or Fluorite. The quartz will act like sandpaper and destroy the softer stones.
FAQ
Q: Can I tumble Rose Quartz and Clear Quartz together? A: Yes. Since they share the same Mohs hardness, they will tumble beautifully together without one damaging the other.
Q: Why does my quartz look dull after the polish stage? A: This is usually due to "burnishing" issues or residual grit. Try running the stones in the barrel with just water and a few tablespoons of shaved Ivory soap or Borax for 24 hours to "deep clean" the surface.
Q: How much ceramic media should I use? A: For quartz, we recommend a mix of about 30% media to 70% stone. This provides enough cushioning to prevent those pesky white bruises.
Affiliate Disclosure: This post contains affiliate links for raw quartz and specialized lapidary polishes. If you choose to purchase through these links, The Polished Pebble may earn a small commission at no extra cost to you, helping us continue to provide free guides for the hobbyist community.